
The People & Security function contains nearly all the tools needed to manage both learning users and administrative users.
Navigate to People > Maintain People and Security in the Navigation Bar of the Administrator's Console.
Use one or more of the search criteria text boxes (Last Name, First Name, User Name, Employee ID, or Email) to find the user's record,
select user from the search results and click Edit.
The Overview tab is the default view on the user profile.
On this tab you can:
Click Save to save your work and keep editing, or Save & Close to save your work and exit the profile.
Navigate to People > Maintain People and Security in the Navigation Bar of the Administrator's Console.
Use one or more of the search criteria text boxes (Last Name, First Name, User Name, Employee ID, or Email) to find the user's record,
select user from the search results and click Edit.
Locate the Actions drop-down menu in the top toolbar and click View Training Plan/History.
A list of items on the user's Training Plan and Learning History will appear. You will see columns containing data for the Course Name, Status, Hours (spent on the training), Score, Completion Date, Completion Deadline, Expiration Date, and Certificate (if a certificate of completion was granted).
On the left side of the screen there is an "i" icon next to each course name.
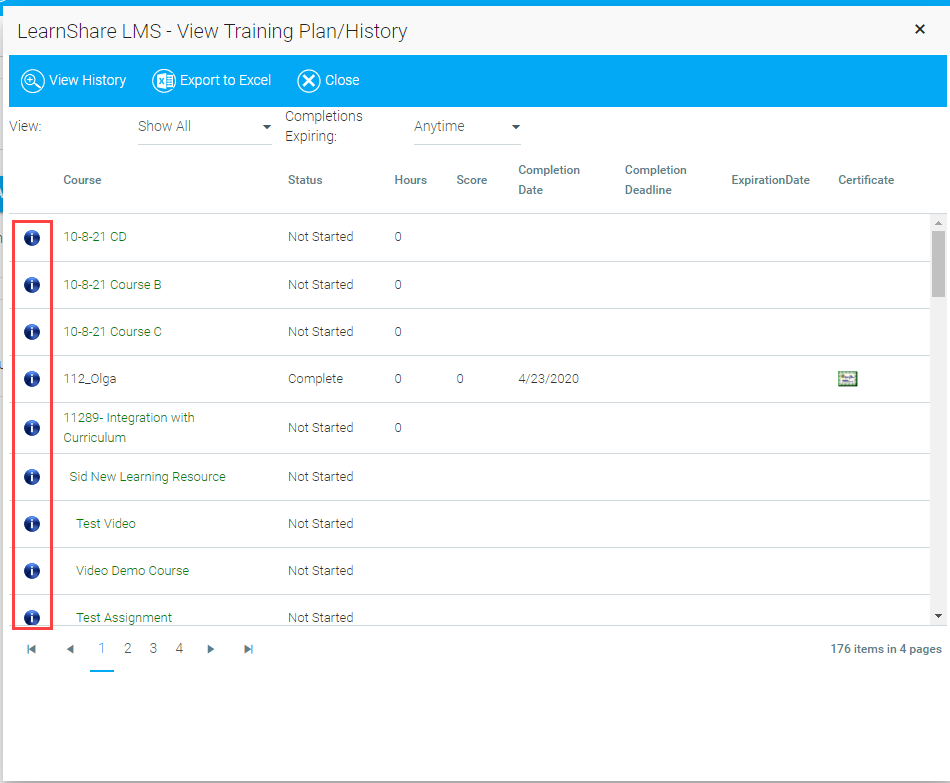
Click this icon to see the details of the audience mapping for the selected course. The effective audience is shown at the top and all additional audience mapping information is shown below.

When you're finished, simply close out of the windows to exit this function.
On the right side of the Overview tab on the user's profile, use the drop-down arrows to assign the user to one or more domains, such as locations, departments, or job roles. These fields are unique to each system.
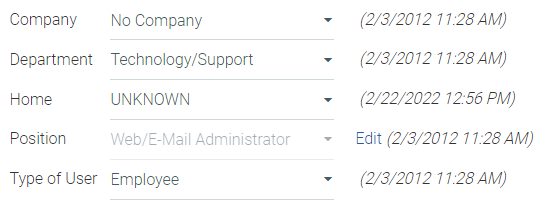
The dates shown to the right of the domains (above) are the dates which those particular domains went into effect for the user. This can affect audience membership when audiences are based on domain values. Please see Managing Course Audiences for more information.
Alternately, you may simply begin typing a keyword in the field and a list of matching terms will appear as you type:

Some domains may support multiple entries:
If a user is added to a parent domain level, they will not automatically be part of any child domain level(s).
As a general rule, a user will see the resources and people that are a part of the mapping of their highest security role. The highest security role will also dictate which screens a user has access to in the administrator console.
Example: a user is both an Administrator and a Training Manager. As an Administrator they have security for 5 locations; but as a Training Manager they have security for 10 locations. Since the Administrator role takes precedence over the Training Manager role, this user will only see people in the 5 locations.
Many security roles require mapping, for example Administrator. The mapping determines which courses a user assigned as an Administrator will be able to access, as well as who they will see on reports, etc.
The mapping on the Resources tab controls which courses, the user in this role, will be able to view on the Maintain Learning Resources screen. The security role resource mapping must match some form of the audience mapping on the resource in order for the user to view the resource. The resource audience mapping could be on the resource’s primary audience tab, a secondary audience tab, a catalog or curricula. If any of these audiences match the security role’s resource mapping, then the user will be able to view the resource.
Example:
For this role, the user will only see resources in which the All Department (Admin, Best Practice, Demo) domain is included in the mapping.
The audience mapping for the following resource is All Company. So the user will not see this resource because their security role mapping is based on the Department domain, not Company.
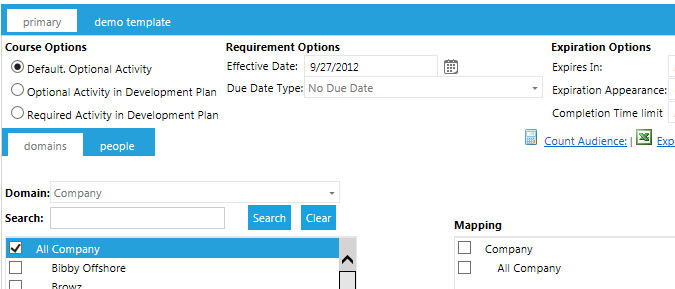
The "Grant All" option automatically maps the user to all levels, of all domains thus ensuring that they will be able to view all resources regardless of the audience mapping on the resource.
The mapping on the People tab controls who the administrative user can view throughout the system. For example only users within their people mapping will appear on reports, on the Manage Credit and Enrollment screen, and be accessible on enroll others and batch upload functions. Depending on your system configuration, it may also limit who can be viewed on the Maintain People and Security/ View Person screens.
The "Grant All" option automatically maps the user to all levels of all domains thus ensuring that they will be able to view all users in the LMS.
The default for all security roles is that when viewing the class calendar or course catalog, an administrative user will see all resources that fall within the resource security of their highest security role. However, in some LMS systems select security roles may use intrinsic mapping for viewing the class calendar and course catalog. This means that the administrative user will see the resources appropriate for them as an individual user, regardless of their security role mapping.
The chart below lists the standard security roles set by LearnShare. You may have additional custom security roles in your system.
|
Role |
Mapping? |
Description |
Security Level |
|
Company Administrator |
yes |
The Company Administrator is the highest level role. Company Administrators typically have access to all users through the Maintain People and Security screen and all resources through the Maintain Learning Resources screen regardless of mapping. The Company Administrator uses the Administrator's Console for access to these LMS functions. |
5000 |
|
Administrator |
yes |
An Administrator has less capability than the Company Administrator. Most often the user will have access to report, resource, and content functions, but not system functions. The Administrator uses the Administrator's Console for access to these LMS functions. |
4000 |
|
Report User |
yes |
A Report User gains access to reports, but typically no other functions. The Report User role is ranked higher than other roles to allow a greater reporting security while still limiting functional security to a smaller group. The Report User uses the Report Catalog menu option. When a user has the Report User role, the system will use the permissions on this role to determine who is visible on reports instead of another security role (even if the other role has a higher precedence). |
3000 |
|
Training Manager |
yes |
A Training Manager is functionally equivalent to an Administrator, but has a lower precedence. The Training Manager is typically limited in their security assignment to specific departments, or business units. Most often the Training Manager will have access to report, resource, and content functions. |
3000 |
|
Instructor |
yes |
Instructor access is typically given to individuals who need to set up, manage, and grant credit for class sessions. Note
While Company Administrator and Administrator roles typically allow access to the Instructor functions, only the Instructor role allows the user to appear on the list of Instructors on the Class tab of the Maintain Facilitated Sessions screen. |
2000 |
|
Help Desk |
yes |
A Help Desk role can be used to give access to specific screens appropriate for help desk personnel. Typical functions include the ability to lookup or change passwords, as well as access to FAQ documentation. |
1000 |
|
Content Administrator |
yes |
A Content Administrator is limited to creating LMS content, and is typically given no other permission. |
1000 |
|
Grant Credit |
yes |
The Grant Credit role allows access to the Manage Credit and Enrollment screen. When a user has the grant credit role, the mapping/permissions on this role will dictate which resources and users the user can access on the Manage Credit and Enrollment screen. If a user does not have the Grant Credit role, then their highest security role will dictate which users/ resources they can access on the Manage Credit screen. |
1000 |
|
Manager |
no (mapping done automatically by LMS based on reporting structure) |
A Manager is typically a system-assigned role during your data feed. However, you may assign Manager permissions to users that are created manually, outside of the data feed. A Manager can view or change the Development Plans and approve or decline requests for training. A Manager can also view Performance Plans. |
999 |
|
"No Approval" User |
no |
No Approval users may access any learning resource in the LMS without requiring a Manager's approval. There are no system capabilities associated with this role. |
500 |
|
Facility Coordinator |
no |
This allows the user to appear on the list of Facility Coordinators on the Class tab of Administer Class Instances and to receive automated announcements about a class session. There are no system capabilities associated with this role. |
500 |
|
Training Coordinator |
no |
This allows the user to appear on the list of Training Coordinators on the Class tab of Administer Class Instances and to receive automated announcements about a class session. There are no system capabilities associated with this role. |
500 |
|
Translator |
no |
Access to the Maintain Translations screen so that translated text can be entered. This is only available for globalized systems. |
0 |
Security roles determine which system options will be available to each user. For example, an Administrator may have the ability to reset a password, but a Training Coordinator would need to make a request to an authorized administrator.
The list of roles and permissions are specific to each system.
To assign a system role and security level for a user click the Roles & Security tab on the user's profile:
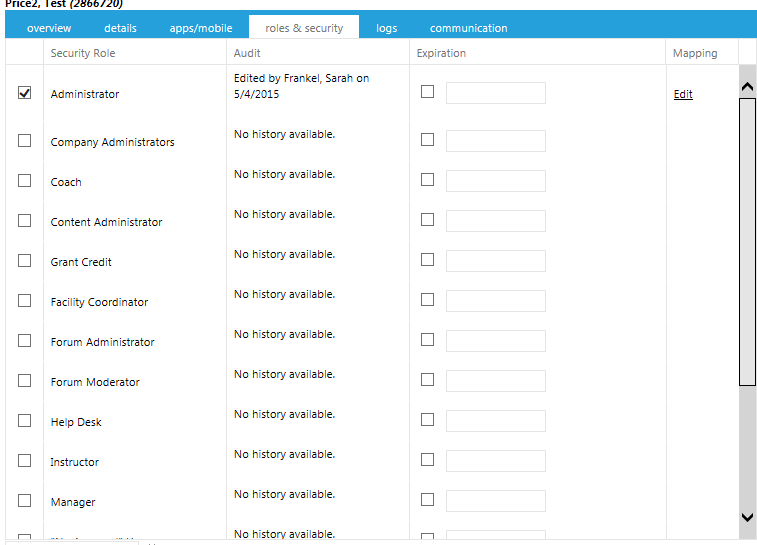
Click one or more check boxes on the left to assign a Security Role.
The Audit column shows when the role was last edited.
The Expiration column allows you to temporarily assign a security role to a user. Click the check box, then click inside the accompanying text box to either type an expiration date (MM/DD/YYYY) or select a date from the pop-up calendar that will appear.
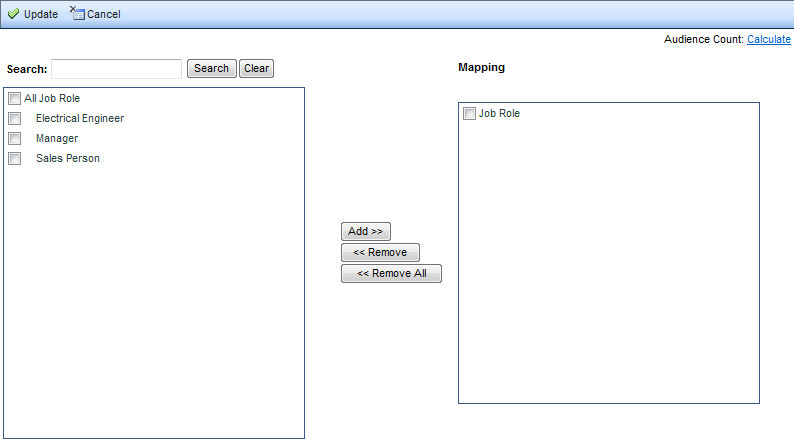
If a role needs an audience assigned, the Mapping column will have an Edit link. Click this link to apply this user's span of control to selected domains. If you forget to assign audience mapping to the role, the user will not be assigned the selected role.

There are two options for mapping a security role: Resources and People.
The Edit link opens the Resources tab for audience mapping, which controls which courses the selected security role will be able to view on the Maintain Learning Resources screen. The security role resource mapping must match some form of the audience mapping on the resource in order for the administrator to view the resource. The resource audience mapping could be on the resource's primary audience tab, a secondary audience tab, a catalog or curricula. If any of these audiences match the administrator's resource mapping, then the administrator will be able to view the resource.
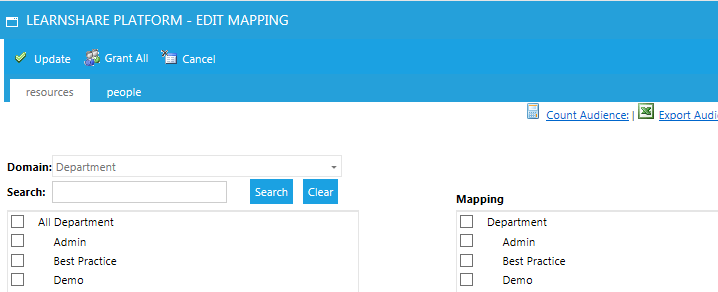
Example: The following security setting will allow the user to only see resources which are included in the sub-domains Admin, Best Practice and Demo within domain Department:

If the only audience mapping for a resource is within the Company domain, then this user will not see that resource because the security mapping was set on the Department domain and not the Company domain.
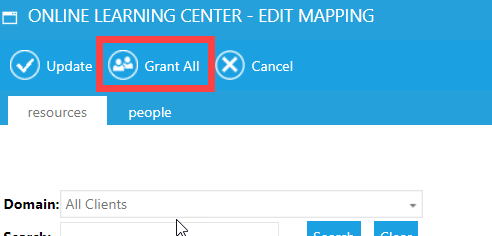
The "Grant All" option automatically maps the user to all levels of all domains thus ensuring that they will be able to view all resources regardless of the audience mapping on the resource.
The mapping on the People tab controls who the user can view throughout the system. For example only users within their people mapping will appear on reports, on the Manage Credit and Enrollment screen, and be accessible on enroll others and batch upload functions. Depending on your system configuration, it may also limit who can be viewed on the Maintain People and Security/ View Person screens.
Again, the "Grant All" option automatically maps the user to all levels of all domains thus ensuring that they will be able to view all users in the LMS.
Once you set the mapping, click Update. You will then need to click Save or Save and Close to save all your changes.
This function allows you to link credentials to a user's profile, such as training certifications, licenses held, or college degrees achieved.
From the System Admin View, click, People > Maintain People and Security.
Use the text boxes to search for a user by last name, first name, user name, employee ID, or e-mail address. Click Search.
Select the user from search results and click Edit.
On the person's profile, click the Actions drop-down, then click View User Credentials.

On the next screen click Add.

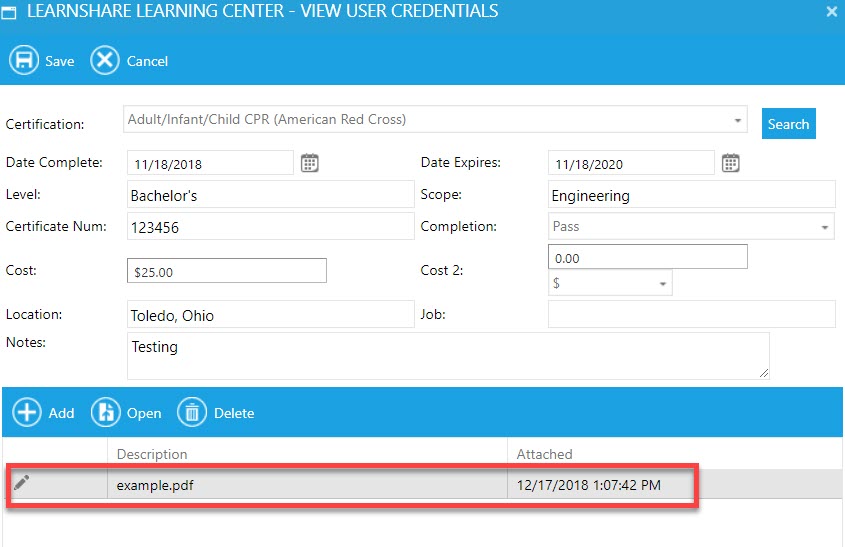
On this screen you will enter the details for the User Credentials:
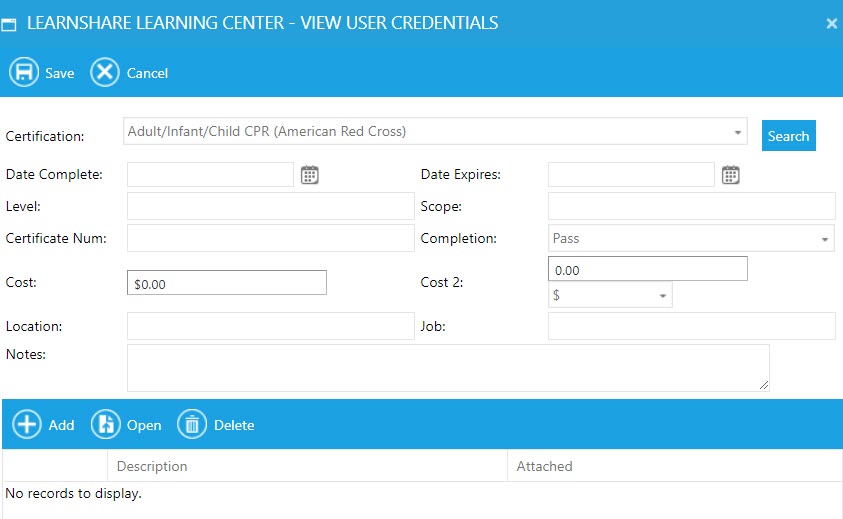
Click the Certification drop-down and select a credential.
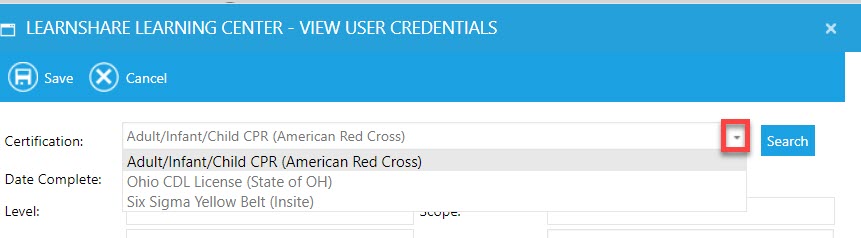
If the list is very long, you may use the Search button to find the credential you want. Another pop-up will appear. You may click either column heading to reorder the list, if desired.
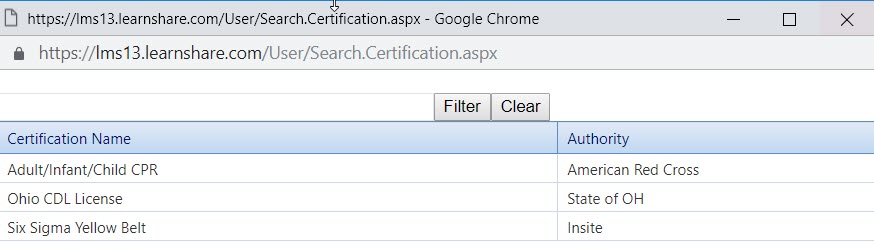
If needed, type a search term in the text box at the top, then click Filter.
Click on the credential to select it, then click Select.
Type or use the calendar icon to enter a completion date and expiration date, if applicable. Note: If you enter a Date Completed, you must enter a Date Expires.
Enter a Level and Scope of the training, if desired.
For example: "Bachelor's degree" for Level, and "Engineering" for Scope
If the credential contains a serial or some kind of unique identification number, enter it in the Certification Number field.
Select Pass, Fail, or Pending from the Completion drop-down.
Enter the cost of the credential, if applicable. Use numerals only; the currency will automatically be applied.
Enter a Location, Job description, and any additional Notes, if desired.
You can add a scan of the credential or other associated document (such as a receipt for the cost of training or license, or example). Once the object is scanned, upload it from your hard drive or network by clicking the Add button.

This will open a pop-up window where you can Browse to the document on your computer and follow the prompts to select and add the file.
Click Upload. The screen will refresh to show your uploaded file:
Click the pencil icon to edit the file name, if desired. The screen will refresh to show you the file name in an editable text box. Type a new name, then click the green check mark to save, or the red X to cancel without saving.
To view the object, click to select it, then click Open.
When prompted, click to Open the file. (Depending on your operating system, you may receive an additional prompt to allow the file to open.) The object will open in a new window.
When finished, click Save at the top of the Credentials screen. The screen will refresh to show the linked credential.
To Edit or Delete it, click to select the credential, then click the appropriate button.
To Exit the Credentials pop-up, click the X in the upper right-hand corner.
Due to various scenarios, there may be times when one user ends up with two profiles in the system. When this happens, the duplicate profile can be merged into the correct profile. The merging process can merge the Training Plan, Talent Profile, Performance Goals, and Competency Assessments. To merge two profiles:
Search for the duplicate profile (the one that will no longer be used). In this document, this account will be referred to as the From account.
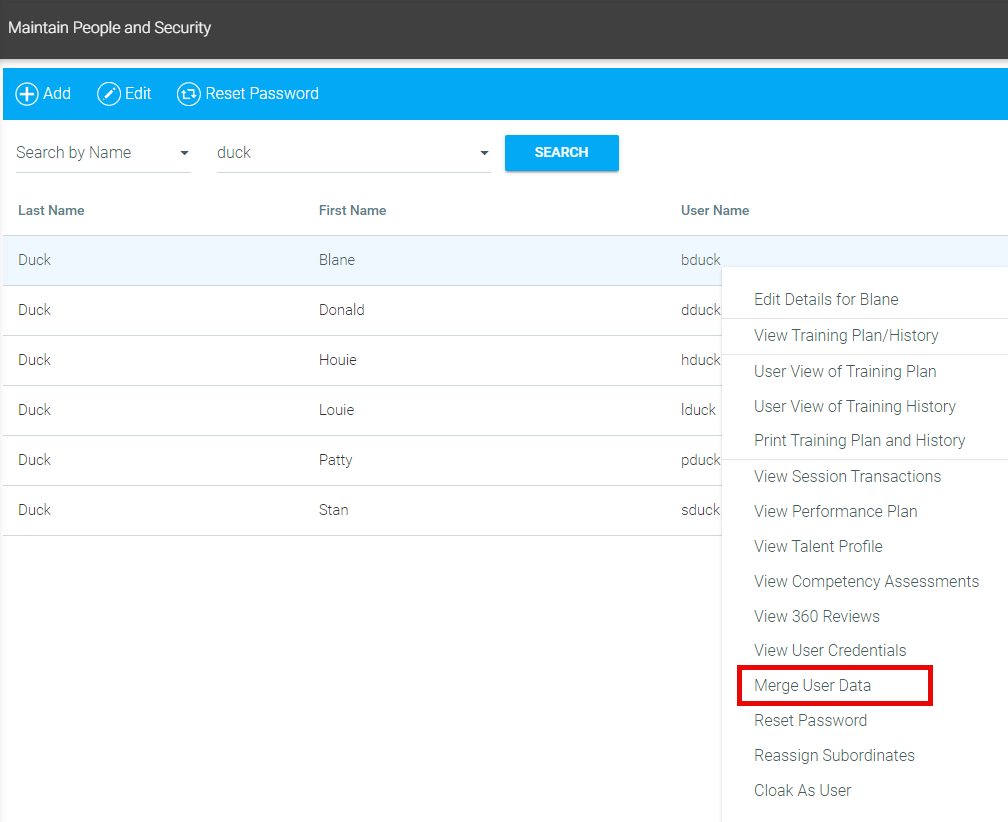
If you search via the Maintain People and Security search screen, right-click on the employee's record and select Merge User Data from the pop-up menu.
Or, if you are already viewing the employee's profile, click the Actions button in the menu bar and click Merge User Data.

When Merge User Data is selected, the following pop-up window will appear:
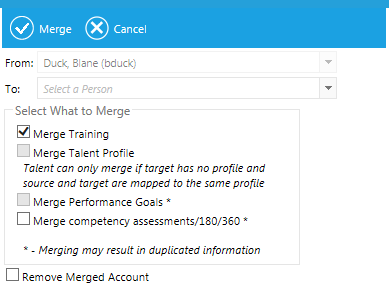
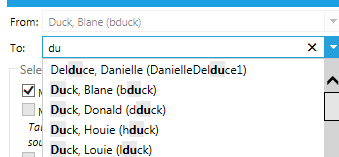
Begin typing in the To field to find the profile with which you want to merge (the correct profile).
Select the correct account to place it in the To field. The correct account will be referred to as the To account in this document.
Check the fields that you would like to merge.
By default only the Merge Training box is checked. This is the only option that pertains to LMS users. Merge Training will move all resources on the From account’s Learning Plan and History to the Plan and History of the To account.
If your system also has the Performance Management System installed, you will also have the following options:
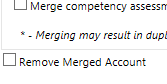
If you would like for the From Account to be permanently deleted from the system, check the Remove Merged Account at the bottom of the pop-up box.
Click Merge.
A confirmation box will be displayed. Click OK to proceed, or Cancel to quit.
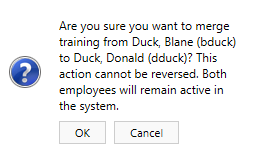
A confirmation window will appear when the operation is completed. Click OK.
If you did not choose to remove the merged account, you can make it inactive if desired.
There are two ways to reset the user's password:
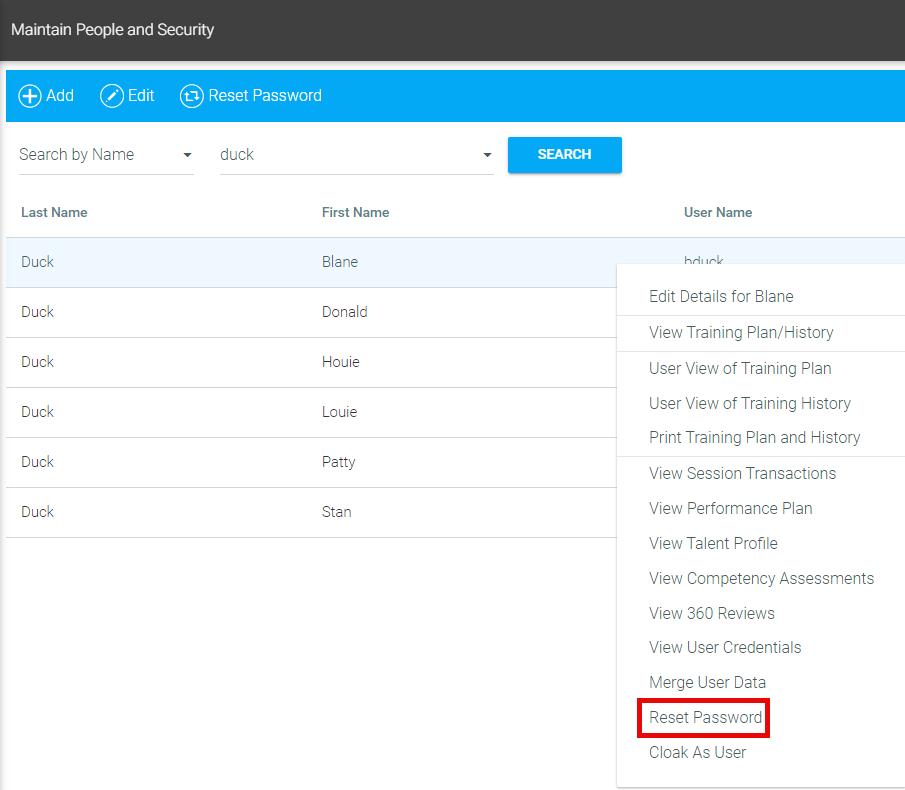
On the Maintain People & Security home screen, search for the employee using one or more of the text fields. When the user appears in the search results, right-click on the record and select Reset Password from the pop-up menu.
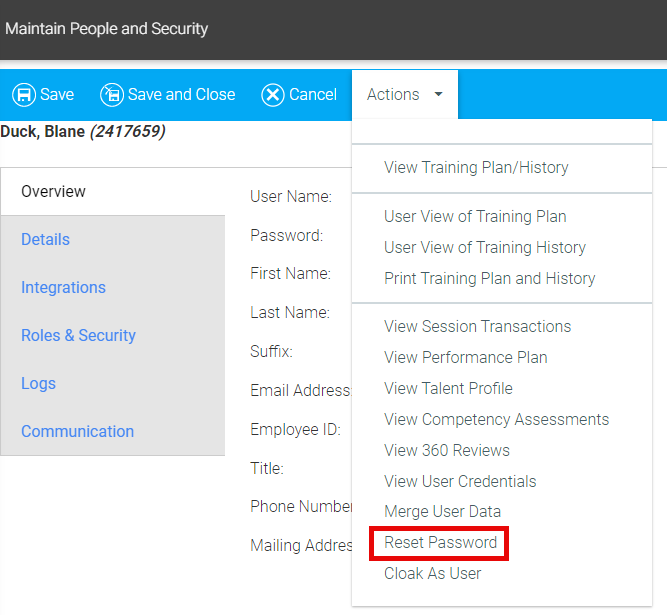
Alternately, if you are already viewing the user's profile, click the Actions button and select Reset Password.
The system will automatically assign a new password and e-mail it to the user's email address.
This option may or may not be visible to you. If it is not, you will be required to request a password change through an authorized administrator.
"Cloaking" allows you to temporarily access the LMS as if you were another user for troubleshooting, testing, or resolving issues. Because this allows you to login without needing their login credentials, your organization may have this function disabled in your LMS.
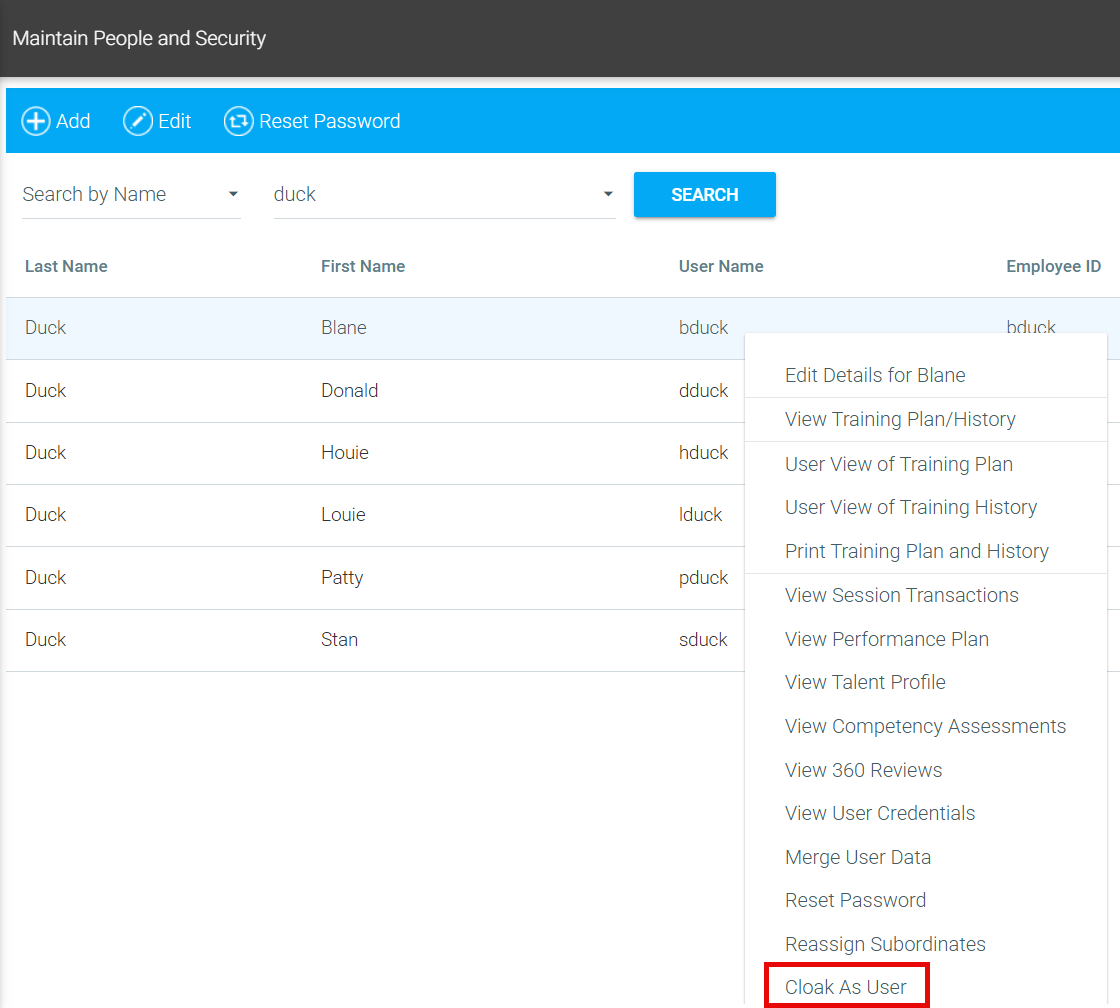
To cloak as a user, navigate to the Maintain People & Security home screen, search for the employee using one or more of the text fields. When the user appears in the search results, right-click on the record and select Cloak as User from the pop-up menu.
Alternately, if you are already viewing the user's profile, click the Actions button and select Cloak as User.
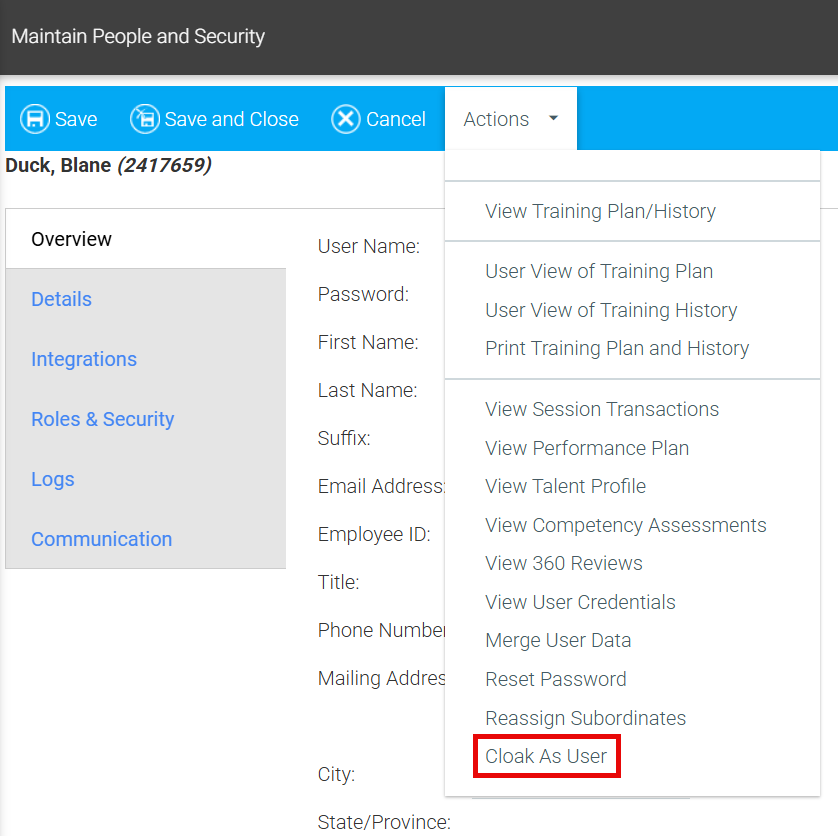
Cloaking is not designed for taking courses, nor is it recommended for reporting or viewing analytics. This is because users' credentials are cached upon login, but not uncached when cloaking. This means that if an administrator cloaks as one of their direct reports, then runs a report, the report will display data based on the administrator's credentials and not the direct report's.
If you intend to view a report or dashboard while cloaking, follow these steps:
The cloaking feature is generally enabled by default but could be disabled if your company's security policy prohibits its use. It is important to note that cloaking is limited to the highest level of permission, so it may not be available to your role.
Decloaking
When you are cloaking as a user, you will see a ribbon at the bottom of the screen indicating the user you are cloaking as.

When you are finished cloaking as the user, click the Decloak button. This will return you to the Administrator's Console.
In the event that you need to reassign people who report to a user, you will need to use the Reassign Subordinates feature.
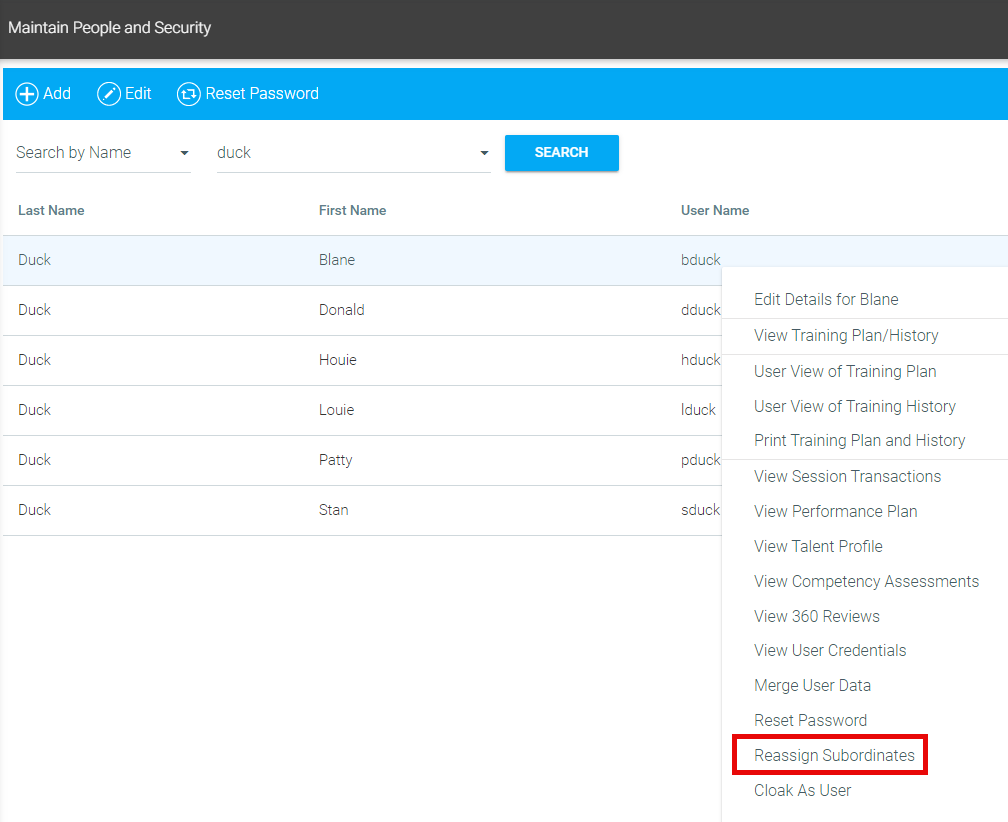
On the Maintain People & Security home screen, search for the employee using one or more of the text fields. When the user appears in the search results, right-click on the record and select Reassign Subordinates from the menu.
Alternately, if you are already viewing the user's profile, click the Actions button and select Reassign Subordinates.

The Reassign Subordinates pop-out box will appear. You will see the name of the current user you are viewing in the New Manager field. All employees who currently report to that user will appear in the Employees field.
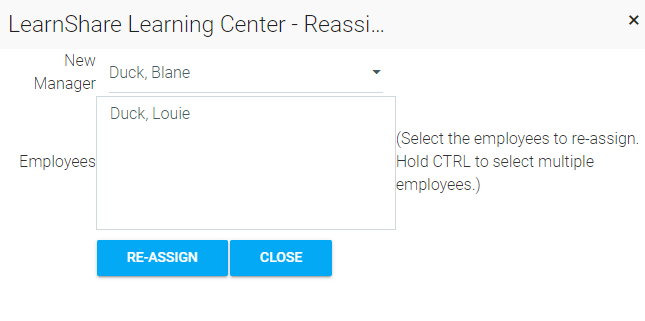
Use the New Manager field to search for the name of the user who the employees should now report to.

Select the employee(s) from the list who you wish to reassign to the new manager. Finally, click the Reassign button.
Depending on the configuration of your company, you may or may not see this feature. If you do not see this feature and would like to have it enabled, please contact Client Support.
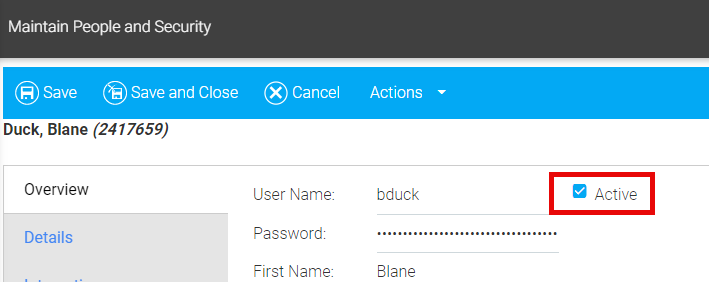
To deactivate a user, open the user profile and un-check the Active check box next to User Name on the Overview tab.
From the bottom of the Overview tab of the employee profile, click Add Note to History.

A pop-up window will appear. Type the note and click Save.
The note will appear in the profile history when you click View History.


At the bottom of the Overview tab of the user profile, click View History.

A pop-up window will appear with a history of profile updates. These updates only show those changes made manually by users, not those created by a data feed.
Click Export to Excel to send the data to an Excel file, or Close to exit.